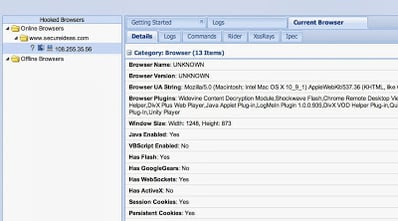
Recently during a penetration test, I discovered a Linksys WRT54G wireless router that had been installed on a customer’s network. Surprisingly, this device was accessible from the Internet with default credentials. Watching the client list, I noticed several clients connecting on & off throughout the day. We all know that this is bad, but how do we actually exploit this weakness?
The goal of this post is to show how simple it is to take advantage of this vulnerability using free tools. These techniques should never be used on targets that you don’t own or have explicit permission to assess.
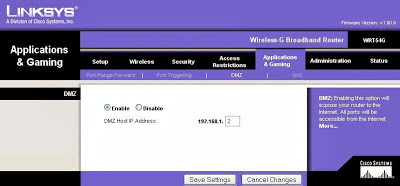
A couple of different attacks immediately came to mind. The first is to setup the “DMZ mode” functionality in the router. This allows all incoming traffic from the internet to be forwarded to a single IP address. Using this feature I could cycle through the clients in the DHCP log and scan each of the internal clients for vulnerabilities.
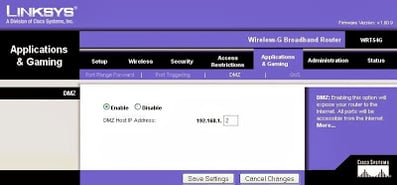 |
| Many routers have a “DMZ-mode” to forward incoming traffic to an internal IP. |
But there are problems with that attack. First, using a scanner like Nessus through a consumer-grade router can often overwhelm it. The NAT, PAT, and session tables fill up quickly and the traffic gets dropped. Secondly, because the DMZ mode has no from filter, this effectively puts the client directly on the internet. Even though our testing will take place over a very short time, this isn’t a great option for our clients.
Another attack option is to replace the firmware on this device with custom firmware like DD-WRT. Though this would give me more ability to safely attack the clients, I would never want to modify the firmware of a customer’s device remotely without very explicit permission and directions.
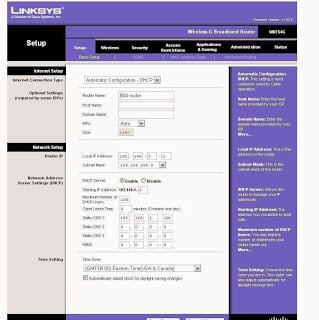
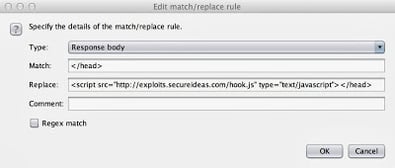
Instead I looked to capture data by modifying the network settings of the router. In this case, I decided to re-route all of the web traffic through a computer I controlled using their DNS configuration. Then I returned spurious DNS results that forwarded their web traffic to a proxy that allowed injection of my own content. And of course I injected BeEF hooks that compromised the clients browser and allowed for further compromise of the machine using Metasploit. Now the external test becomes an internal test.
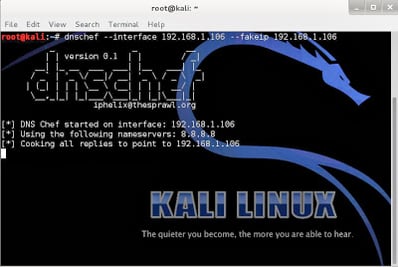
The first step is to setup a DNS proxy. I used a tool called dnschef that’s included in Kali Linux. It’s very easy to use and by default simply proxies all DNS queries to another DNS server. This lets your monitor what queries are being made by the clients. To demonstrate this attack, I’m running it with the following command:
–interface 192.168.1.106 – This tells dnschef to listen for requests on this interface. By default it only listens on localhost.
–fakeip 192.168.1.106 – This hijacks requests by returning this IP as the result for every request. By default dnschef merely proxies requests through to another DNS server.
The next step is to setup a webserver that responds to requests. Ultimately my goal is to filter traffic through Burp Suite, but I can’t direct the traffic directly to it. Burp is expecting to be a proxy for web requests, not the server that responds to the requests. So instead I used the old tool webmitm that’s part of the dsniff toolset. Like dnschef, webmitm is a simple tool that receives and responds to all incoming HTTP & HTTPS requests. By default it merely retrieves the data from the “real” server based on the hostname in the HTTP header and forwards it on to the unsuspecting client. But instead I want it to forward all traffic through a proxy server (Burp).
-d – This enables debug mode in order to get some error messages if things don’t work.
192.168.1.71 – This is the host I want webmitm to forward all requests to. In this case it’s my Burp Suite system. By default, without a specified host, it forwards all requests to the real sites.
Now I’m going to setup Burp to proxy all of the requests so that I can inject content into the responses. To get started with Burp, check out this previous video post. Since webmitm is accepting requests on ports 80 and 443, and it doesn’t have the option to configure another port for the proxy server, I have to setup Burp on a different host. In this case, I’m running it on 192.168.1.71.
By default Burp listens on 127.0.0.1:8080, but I need it to listen on ports 80 and 443, and be in transparent mode. On my MacBook, for a service to open low-numbered ports it must run as root. So I start Burp using the following command.
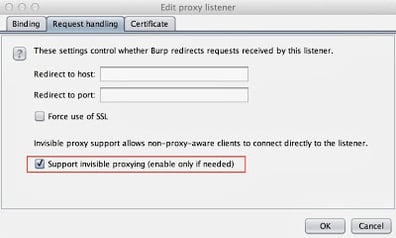 |
| The invisible proxying option is required to forward the traffic through Burp. |
Now I should have at least two Proxy Listeners configured, to listen on port 80 and port 443.
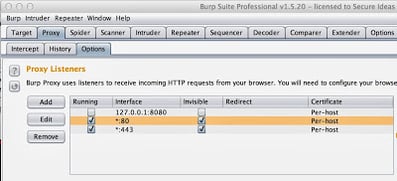 |
| Listening on 80 and 443 is necessary to capture all of the clients’ traffic. |
If you are in need of a penetration test or other security consulting services you can contact us at info@secureideas.com or visit the Secure Ideas site for services provided."
